European Standard Tests Applied To Cold Drawn Spring Steel Wire And Sampling
Following test methods are required for testing spring steel wire quality. Tensile test
The tensile test shall be carried out according to EN 10002-1, on samples with the full cross-section of the wire. For the calculation of
the tensile strength the actual cross-section based on the actual wire diameter is applied. Coiling test
The coiling test shall be carried out in the following manner: A test piece – approximately 500 mm in length – shall be closely wound, under slight but reasonably uniform tension on a mandrel three to three and a half times the nominal diameter. The mandrel diameter shall however be at least 1,00 mm. The close coil shall be stretched so that after releasing the stress it sets to approximately three
times its original length. The surface condition of the wire and the regularity of the spring pitch and individual windings shall be inspected with the test piece in
this condition. Wrapping test
The wrapping test shall be carried out according to EN 10218-1; the wire shall be wrapped 8 turns around a mandrel with a diameter equal to the wire diameter. Torsion test
For the torsion test, the test piece shall be clamped into the device in such manner that its longitudinal axis is aligned to the axis of the
clamping heads and the test piece remains straight during the test. One clamping head shall be turned at as uniform a speed of rotation
as possible (not exceeding one rotation per second) until the test piece fractures. The number of complete rotations of the turning
clamping head is counted. The free length between grips shall be uniformly 100 x d (d = nominal diameter of the wire) with a maximum
of 300 mm. Bending test
For the bending test, a wire sample of sufficient length shall be bent in U form around a mandrel with a diameter equal to twice the wire
diameter for sizes above 3,00 mm to 6,50 mm and equal to three times the wire diameter for sizes above 6,50 mm. For practical reasons the wire shall be deemed to have met the requirements of this standard if it withstands bending around a mandrel smaller than
the one specified. In carrying out the test the wire shall be free to move longitudinally in the forming device. Surface defects test
Testing for surface defects shall be carried out on test pieces from the ends of the wire units after deep etching or on microsections. It may be agreed for wire diameters below 2,00 mm at the time of order, that microscopic testing be carried out immediately after the last
heat treatment. The deep etch test shall be carried out according to EN 10218-1.
In cases where the sensitivity of eddy current testing is adequate, this method may be used by agreement.
In cases of dispute the result of measurement on the micro-section applies.
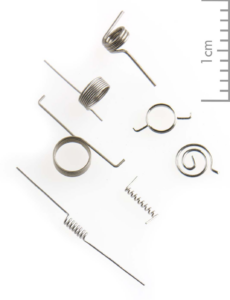
HuaKe is the best partner for the Manufacturer of precision micro springs
HuaKe Steel wire supply the nickel-plated steel wire for making the precision micro contact spring s and touch springs.

